Ever wondered how to bring your Python skills into the world of microcontrollers? With MicroPython and Thonny IDE, turning your ideas into reality has never been easier!. MicroPython and Thonny make it easier than ever to control microcontrollers like the ESP32, Pyboard, ESP8266, WiPy, micro:bit. In this guide, you’ll learn how to set up MicroPython, connect your ESP32 microcontroller to Thonny, and start programming with ease!
Why Choose MicroPython and Thonny?
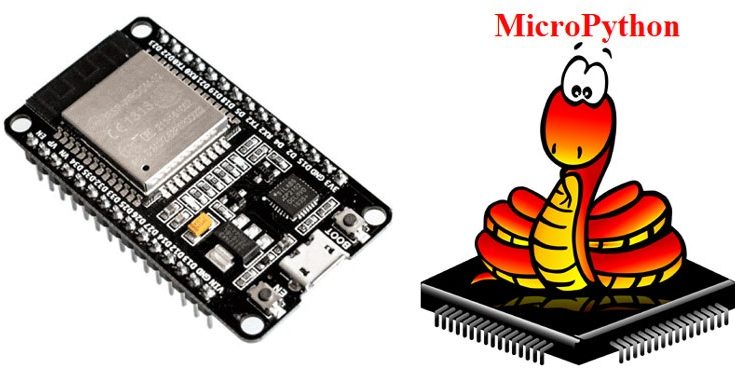
MicroPython is a lean and efficient implementation of the Python 3 programming language that is optimized to run on microcontrollers and embedded systems. Thonny, on the other hand, is a beginner-friendly Integrated Development Environment (IDE) for Python that makes it easy to write, run, and debug Python code.
Setting Up MicroPython
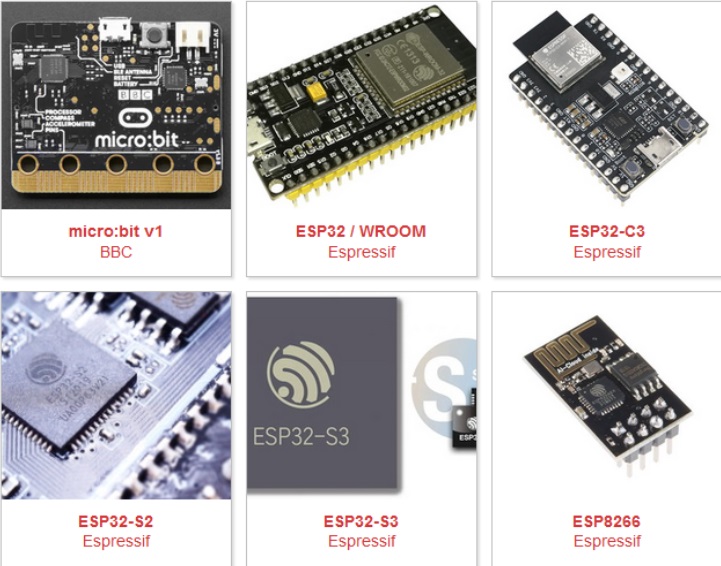
The first step in getting started with MicroPython is to install it on your microcontroller. Many popular microcontrollers, such as the ESP8266 and ESP32 series, support MicroPython. Each microcontroller may have different installation procedures, so this guide is specifically focused on ESP32 series.
To set-up micropython for ESP32, follow the steps below
- Visit the official Micropython website
- Go to the download tab on top of the webpage
- Click on the appropriate microcontroller you are using (ESP32/WROOM in this case)
- Scroll down to the Firmware Releases and download the latest stable firmware to your local folder (eg. Downloads) on your computer.

Setting Up Thonny IDE
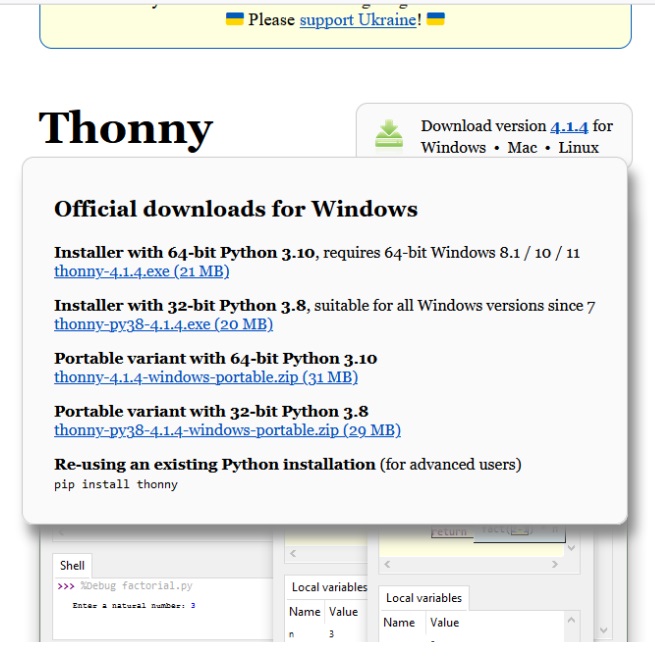
Thonny makes it simple for beginners to dive into Python programming, and it’s even better when used with MicroPython. Download Thonny for Windows, macOS, or Linux from the official website, and follow the straightforward installation process. Whether you’re new to coding or an experienced developer, Thonny provides a clean and intuitive environment to write, debug, and run your Python scripts.

Download Thonny here and follow the instructions prompt on the screen to finish installation.
Installing the CP210x Driver for Windows
Before you can start communicating with your ESP32 microcontroller, you’ll need to install the CP210x USB to UART Bridge VCP driver. This driver allows your computer to recognize and communicate with the ESP32 over a USB connection.
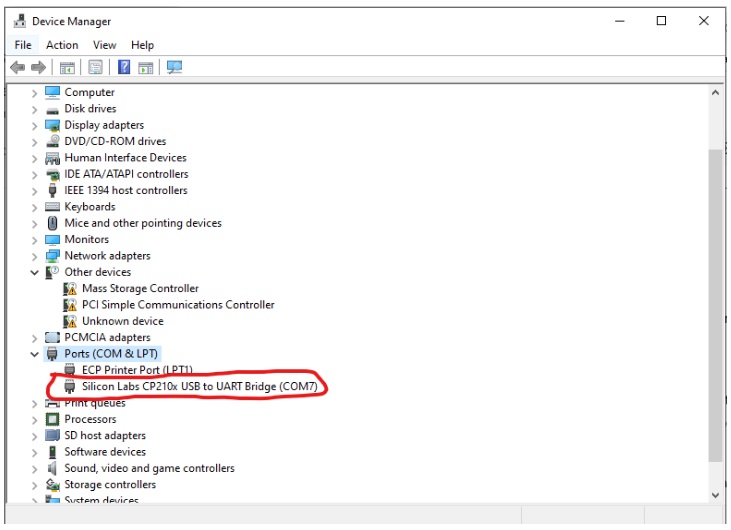
Be sure to verify the driver is correctly installed by going to your device manager and expanding the PORT section.

Why the CP210x Driver is this Important?
Without the CP210x driver, your computer might not be able to establish a connection with the ESP32, which can prevent you from uploading code or interacting with the microcontroller.
Flashing the ESP32 with esptool via Command Prompt
While Thonny offers an easy way to interact with your ESP32, there’s another method that gives you more control over the process—using the command prompt with esptool.py. This approach allows you to manually erase the default firmware and flash new firmware onto your ESP32.
Step 1: Install esptool
First, you’ll need to install esptool, a Python-based utility for flashing firmware onto Espressif chips like the ESP32.
a) Open Command Prompt:
- On Windows, you can open it by typing ‘cmd‘ in the search bar and pressing Enter.
- On macOS or Linux, open the Terminal.
b) Install esptool:
- Ensure you have Python and pip installed.
- Run the following command to install esptool:
pip install esptool
Step 2: Erase the Default Firmware
Before flashing new firmware, it’s recommended to erase the existing firmware.
- Identify Your Serial Port:
- Plug in your ESP32 and find the associated COM port (e.g., COM7 on Windows, /dev/ttyUSB0 on Linux).
- You can check the ports by:
- On Windows: Open Device Manager and check under “Ports (COM & LPT)”.
- On macOS/Linux: Run ls /dev/tty or ls /dev/ttyUSB to list connected devices.
- Erase the Flash:
- Run the following command, replacing COM7 (or/dev/ttyUSB0) with your actual port
esptool –port COM7 erase_flash
IMPORTANT: Hold down the BOOT/FLASH button on the ESP32 while executing this command. This puts the ESP32 into flashing mode.
Step 3: Flash the New Firmware
Now that the flash is erased, you can proceed to install the new firmware.
- Open the command prompt and navigate to the folder where you have the firmware downloaded
(eg. Downloads) using the command cd Downloads
Note that this is the folder/directory containing my already downloaded micropython firmware
- Once you are in the directory, use the command below to install the new firmware into the ESP32 while holding the BOOT/FLASH button
esptool –chip esp32 –port COM7 write_flash -z 0x1000 ESP32_GENERIC-20240222-v1.22.2.bin
Again, replace the COM7 with your actual port and the ESP32_GENERIC-20240222-v1.22.2.bin with the name of the firmware you downloaded
If the process completes without errors, your ESP32 should now be running the new firmware
Now, you are ready to code python on your microcontroller using the Thonny IDE
Connecting Thonny to Your Microcontroller
- After installing Thonny, open the application and go to the Tools menu.
- Select Options and then Interpreter.
- Click on MicroPython (ESP32). If your microcontroller is in the list of supported devices, select it. If not, select the Generic MicroPython option.
- Enter your microcontroller’s serial port in the format specific to your operating system (e.g. COM7 on Windows, /dev/ttyUSB0 on Linux).
- Click OK to save the settings.
Controlling the Onboard LED on the ESP32
Now that you’ve set up MicroPython on your ESP32 and connected it to Thonny, let’s dive into a simple project: controlling an LED. This tutorial will guide you through writing a basic MicroPython script to turn an LED on and off using the GPIO pins on the ESP32.
Step 1: Write the MicroPython Script
Since you’re using the onboard LED, there’s no need for external components. We’ll go straight into coding.
- Open Thonny:
- Ensure your ESP32 is connected to your computer, and Thonny is configured with the correct interpreter as described earlier.
- Create a New Script:
- In Thonny, create a new script by clicking on File > New
- Write the Code:
- Enter the following code into the Thonny editor:
from machine import Pin
import time

# Define the GPIO pin where the onboard LED is connected
led = Pin(2, Pin.OUT)
while True:
	# Turn on the LED
	led.on()
	# Keep the LED on for 1 second
	time.sleep(1)
	# Turn off the LED
	led.off()
	# Keep the LED off for 1 second
	time.sleep(1)
After you have created the python script, click the green play button to run the code immediately, or click the Run button and then click run current script, or you can click F5 to run the script. Once you have done that,
Additional Resources
For further exploration of MicroPython and Thonny, consider checking out the official documentation for each platform. You can also find a rich community of developers and enthusiasts who can help with any questions or issues you encounter along the way.
With this comprehensive guide, you should now have a solid foundation for utilizing MicroPython with Thonny. Whether you’re a beginner or an experienced developer, MicroPython and Thonny provide an accessible platform for programming microcontrollers and embedded systems. Get ready to unleash the power of Python in the world of small-scale computing!
Happy coding!


