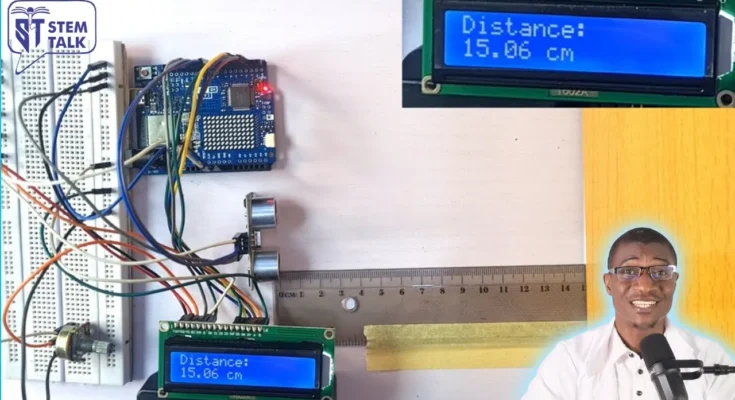
In this detailed video tutorial, we’ll guide you through the process of designing and building a simple yet effective distance measurement device. This project utilizes an Arduino Uno, an HC-SR04 ultrasonic sensor, a 1602 LCD display, a potentiometer, jumper wires, and a breadboard. It’s an excellent starting point for beginners who are new to electronics and programming, as well as those curious about sensor-based projects.
Watch Video Below
What Does This Project Do?
The core of this device is the HC-SR04 ultrasonic sensor, which works by emitting ultrasonic sound waves and detecting their echoes after bouncing off an object. The time it takes for the echo to return is used to calculate the distance to the object. This distance is then displayed in real time on the 1602 LCD, providing a clear and convenient readout.
To make the LCD output legible under different lighting conditions, we use a potentiometer. By turning the potentiometer knob, you can easily adjust the LCD’s contrast, ensuring the characters remain visible no matter the viewing angle or ambient lighting.
Why Should You Build This Project?
This project is a fantastic way to understand how sensors interact with microcontrollers like the Arduino Uno. It teaches you fundamental skills such as:
Wiring and circuit design: You’ll learn how to correctly connect components on a breadboard and troubleshoot common issues. Programming: You’ll write Arduino code to process sensor data and output results to the LCD. Real-world application: Ultrasonic sensors are widely used in robotics, automotive parking systems, and obstacle detection devices. This project gives you a glimpse into how these systems work.
What You’ll Learn in This Video
How ultrasonic sensors work: We’ll explain the principles of sound wave propagation and echo detection.
Wiring the components: Step-by-step guidance on connecting the ultrasonic sensor, LCD, and potentiometer to the Arduino. Writing and uploading code: You’ll see how to write Arduino code that processes the sensor’s input, calculates the distance, and displays it on the LCD.
Adjusting LCD contrast: A demonstration of how the potentiometer affects the LCD’s readability. Testing and troubleshooting: Tips to ensure your device measures accurately and how to fix common issues like inconsistent readings.
Who Is This For?
Beginners: No prior experience? No problem! This video is designed to walk you through every step with clear explanations. Makers and hobbyists: Add a practical tool to your collection and learn valuable electronics skills along the way. Educators and students: This is a great hands-on project for teaching or learning about sensors, microcontrollers, and basic coding. By the end of the tutorial, you’ll have a fully functional distance measurement device and a deeper understanding of how Arduino projects come together. Don’t forget to like the video, share it with others, and subscribe for more fun and educational electronics projects!


